

This article will be part of a series about connecting an esp8266 device to AWS Iot. I will be taking a step by step approach and also attempting to highlight some blockers I had along the way to try and make the process as simple as possible. This will not serve as a comprehensive guide to any of the services or libraries I will be talking about today. Feel free to ask me questions! This tutorial assumes some basic understanding of programing language but I will try and walk through any concepts that might also come up.
The Arduino
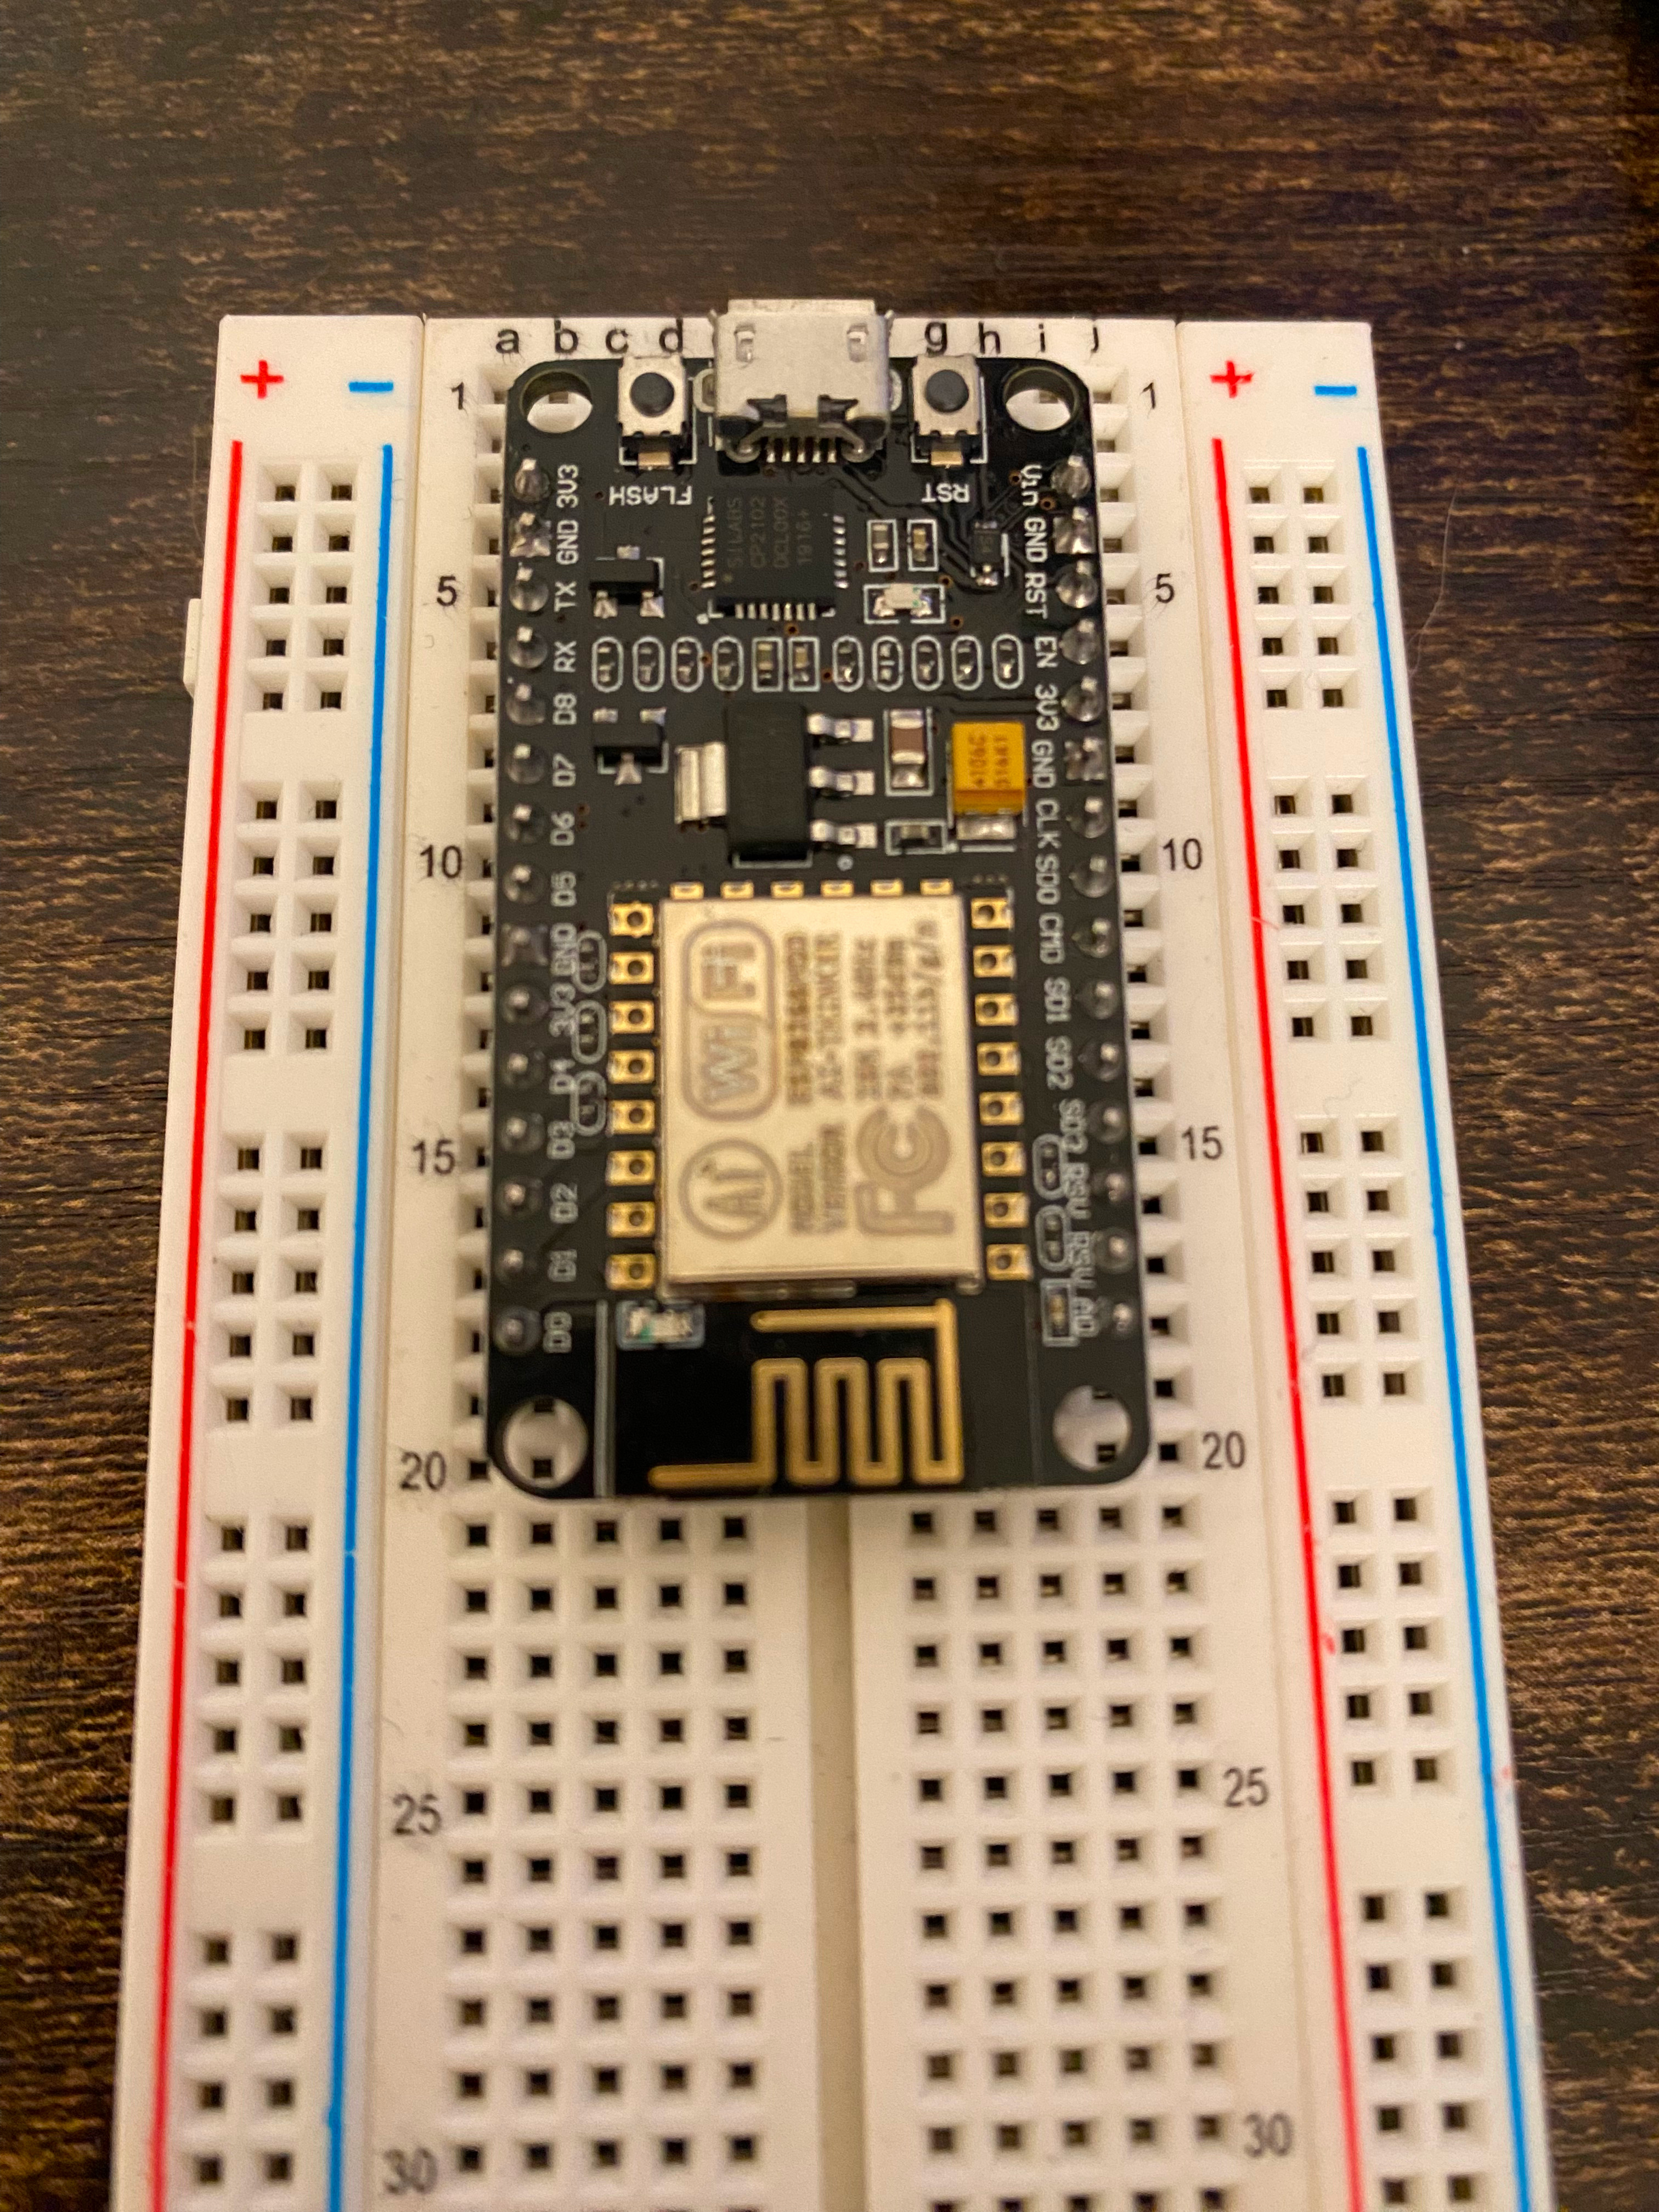
For this project I selected the HiLetgo 1PC ESP8266 NodeMCU CP2102 ESP-12E which can be found here. I wanted something cost effective as I plan on using these devices to just relay information to the cloud. I don’t need a device capable of image recognition; just one with enough ram.
- NOTE: if using an ubuntu or similar Linux distribution, it might be worth installing the IDE from apt store. This would put it under snap. It should be fine either way but you might have issues with accessing things like python.
The IDE Setup
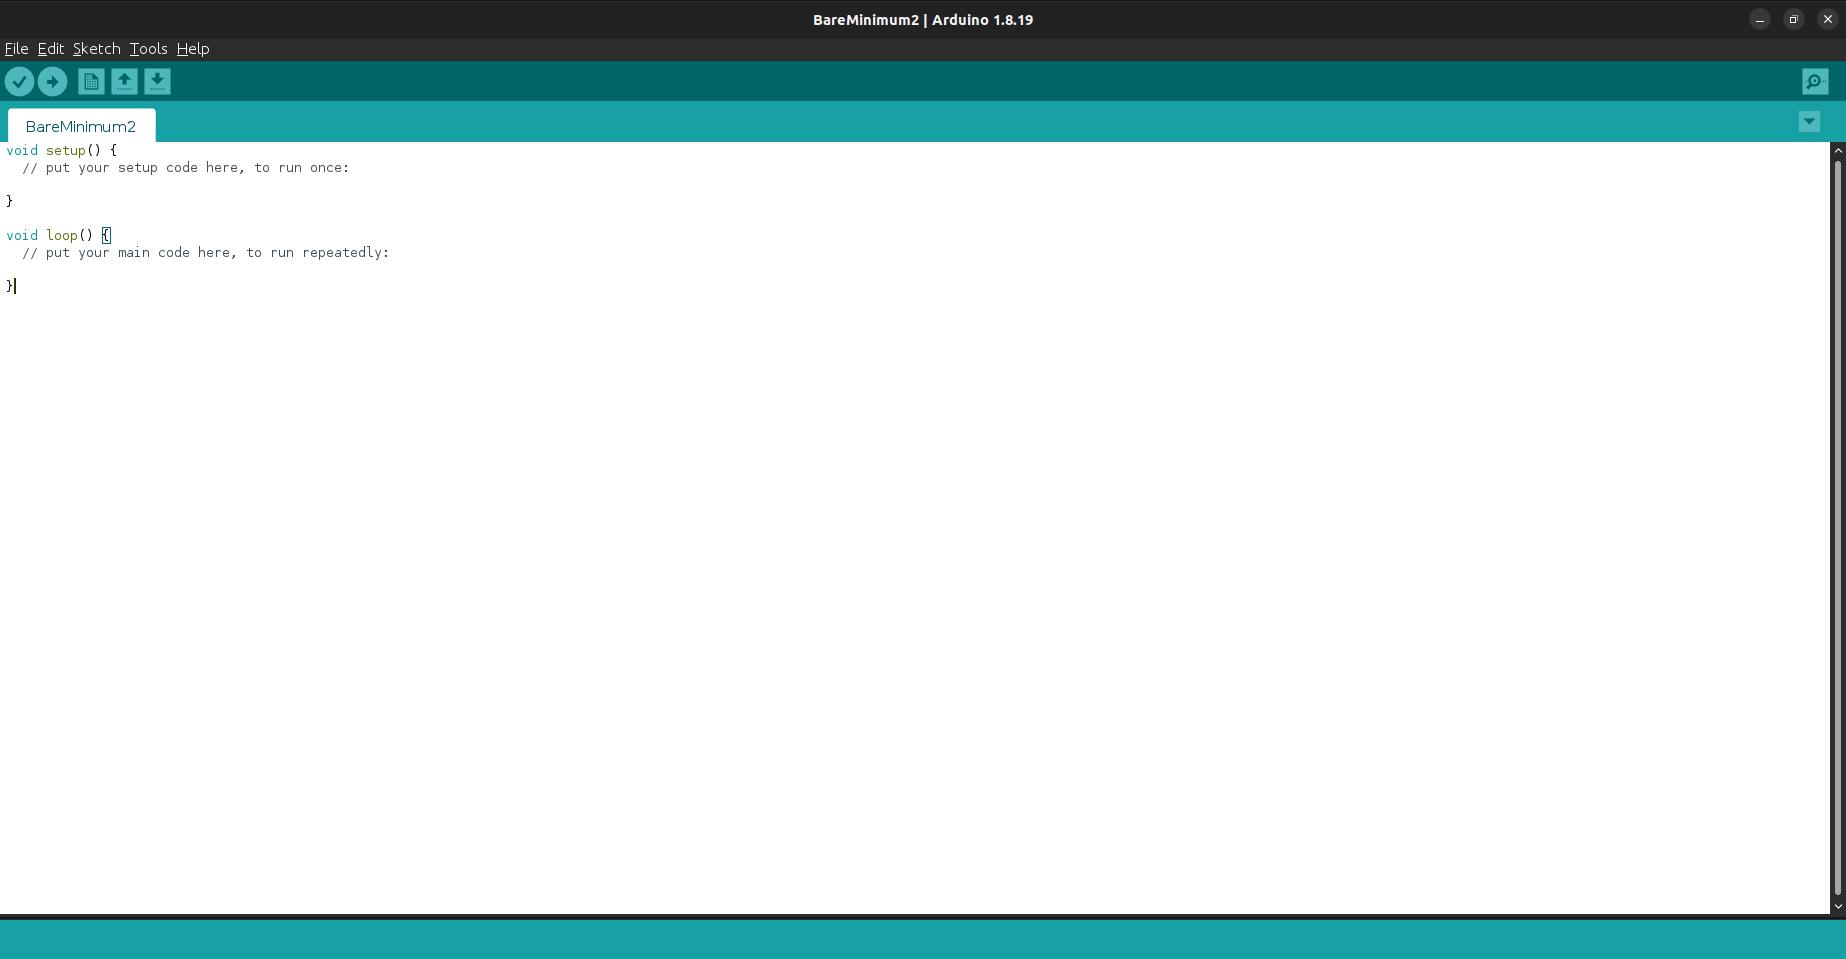
I also will be using the Arduino IDE found here. While there is an Arduino extension for VS code, I found it clunky in implementation. I would be happy when the extension receives more thought into user experience. The Arduino IDE isn’t much better as it lacks modern syntactic highlighting and other features that I have grown to love about VS code. Once those are downloaded and set up you should see something like this:
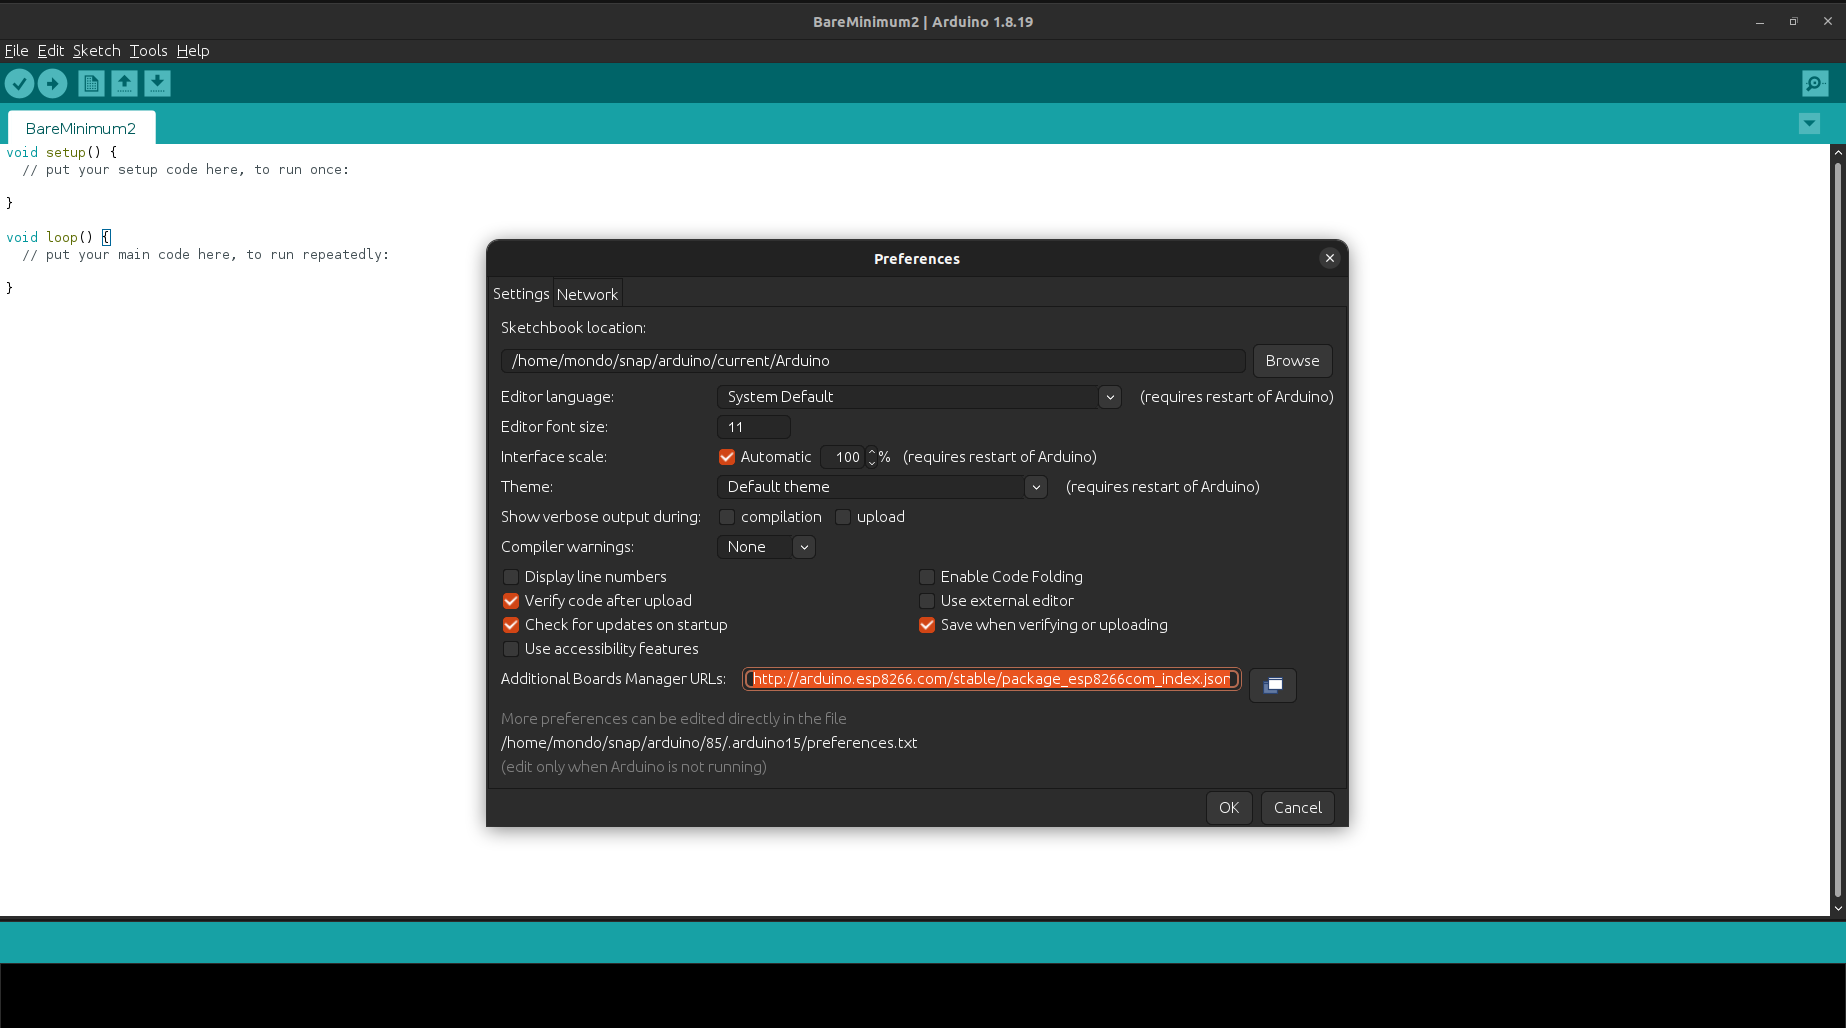
We are specifically using an esp8266 device. Esp32s are also common in utilization but they have slightly different libraries and boards. You will want to click on File > Preferences This will pull up a screen with information about the IDE. In the field to the right of “Additional Boards Manager URL” put the following URL:
- http://arduino.esp8266.com/stable/package_esp8266com_index.json
This is a json containing important information for the esp8266 project who’s github page can be found here: https://github.com/esp8266/Arduino
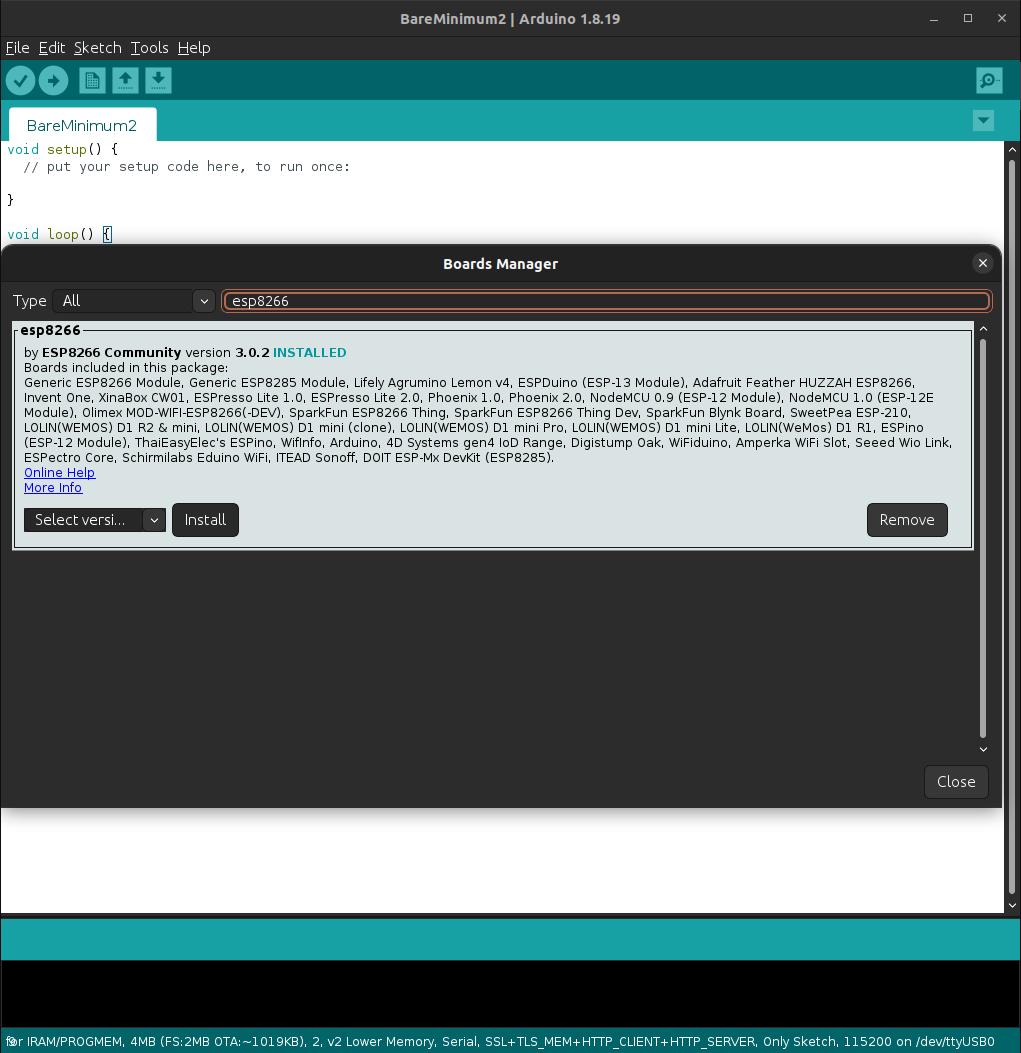
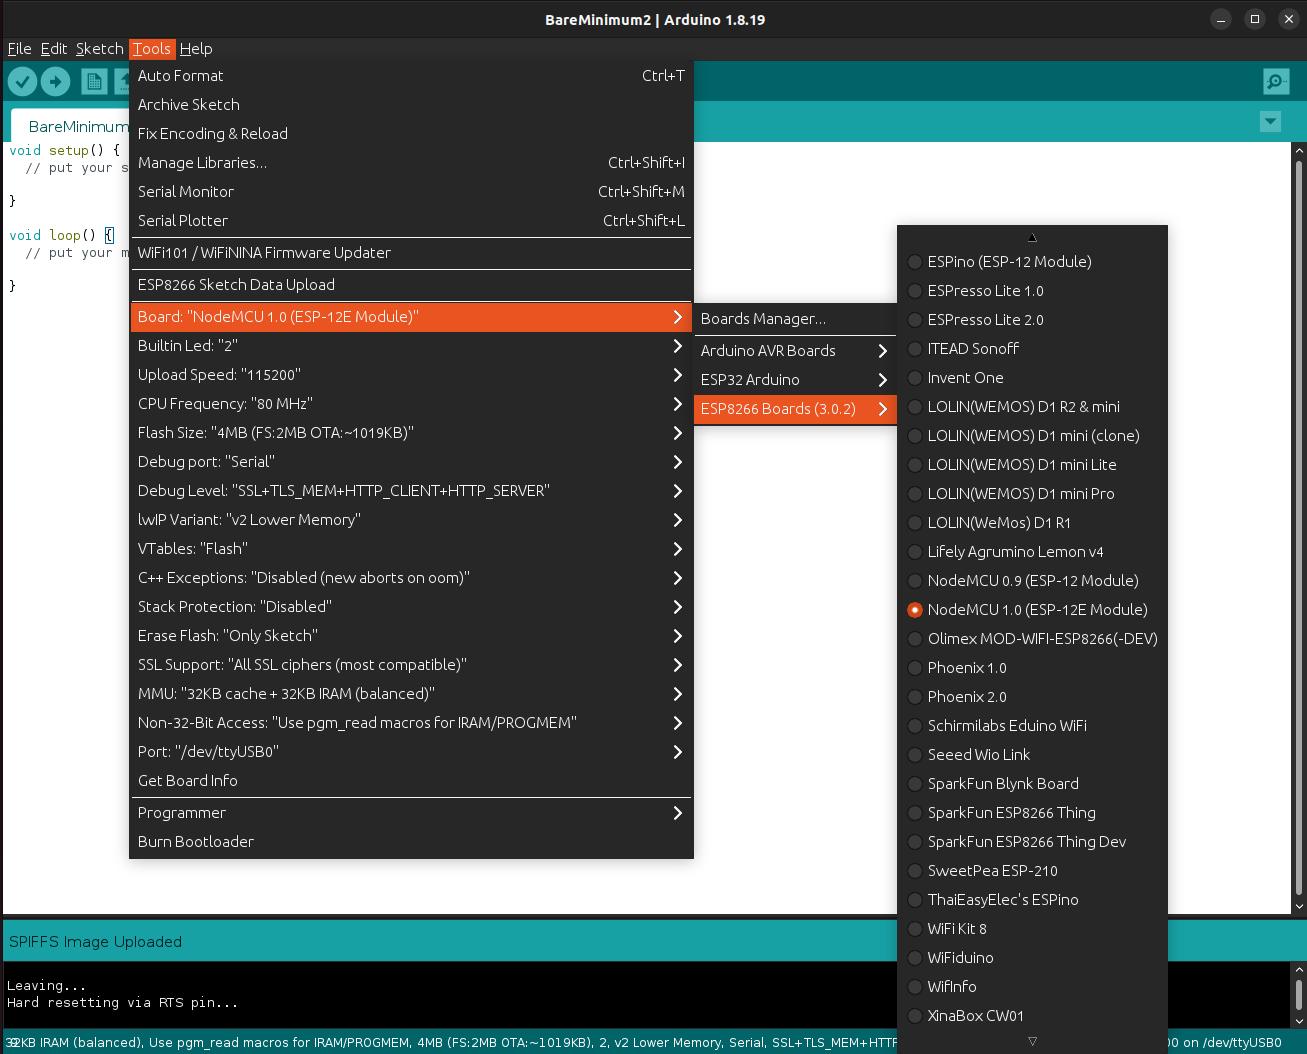
Click OK and the .json will populate information under Tools. Go to Tools > Boards Manager and install the esp8266 by ESP8266 Community.
After that is installed you want to go to Tools > Board: > ESP8266 Boards (VERSION) > NodeMCU 1.0. You can play around with the other board options if you would like.
We also need to install some 3rd party libraries. Under Tools > Manage Libraries You will also need the following libraries:
- NTPClient by Fabrice Weinburg
- PubSubClient by Nick O’Leary
There are some libraries out there that specifically support AWS connection with esp8266. I tend on the side of caution when it comes to these efforts and mostly stick to well supported libraries and features that Arduino directly supports.
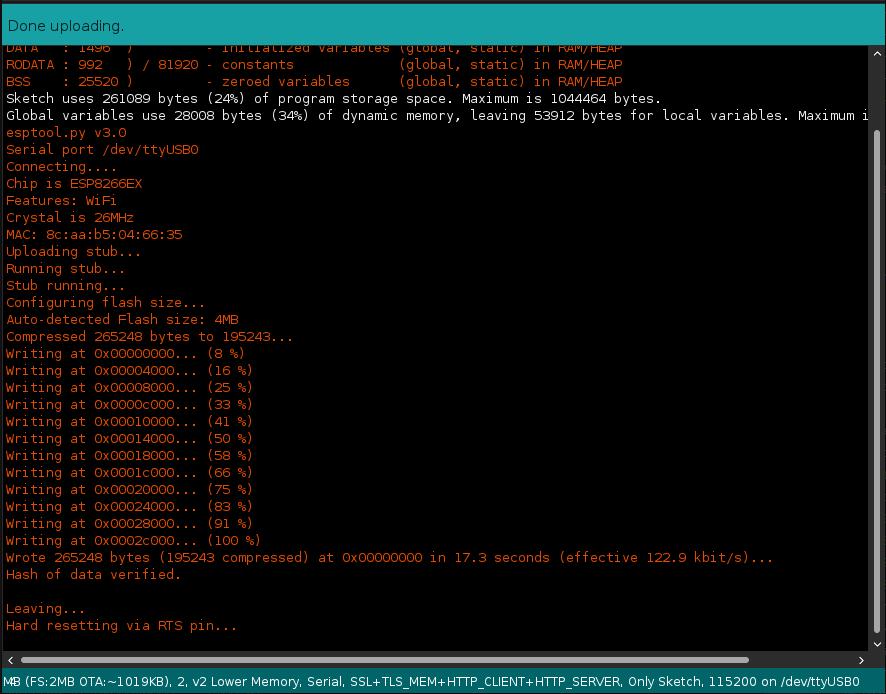
After all that setup you should be able to connect your Arduino to your Computer and upload the BareMinimum sketch at the very least.
We now need to spend sometime setting up the AWS side of things before we continue with any work on the Arduino. We need to get the certs, keys, and permissions so we won’t be immediately kicked by AWS.
AWS
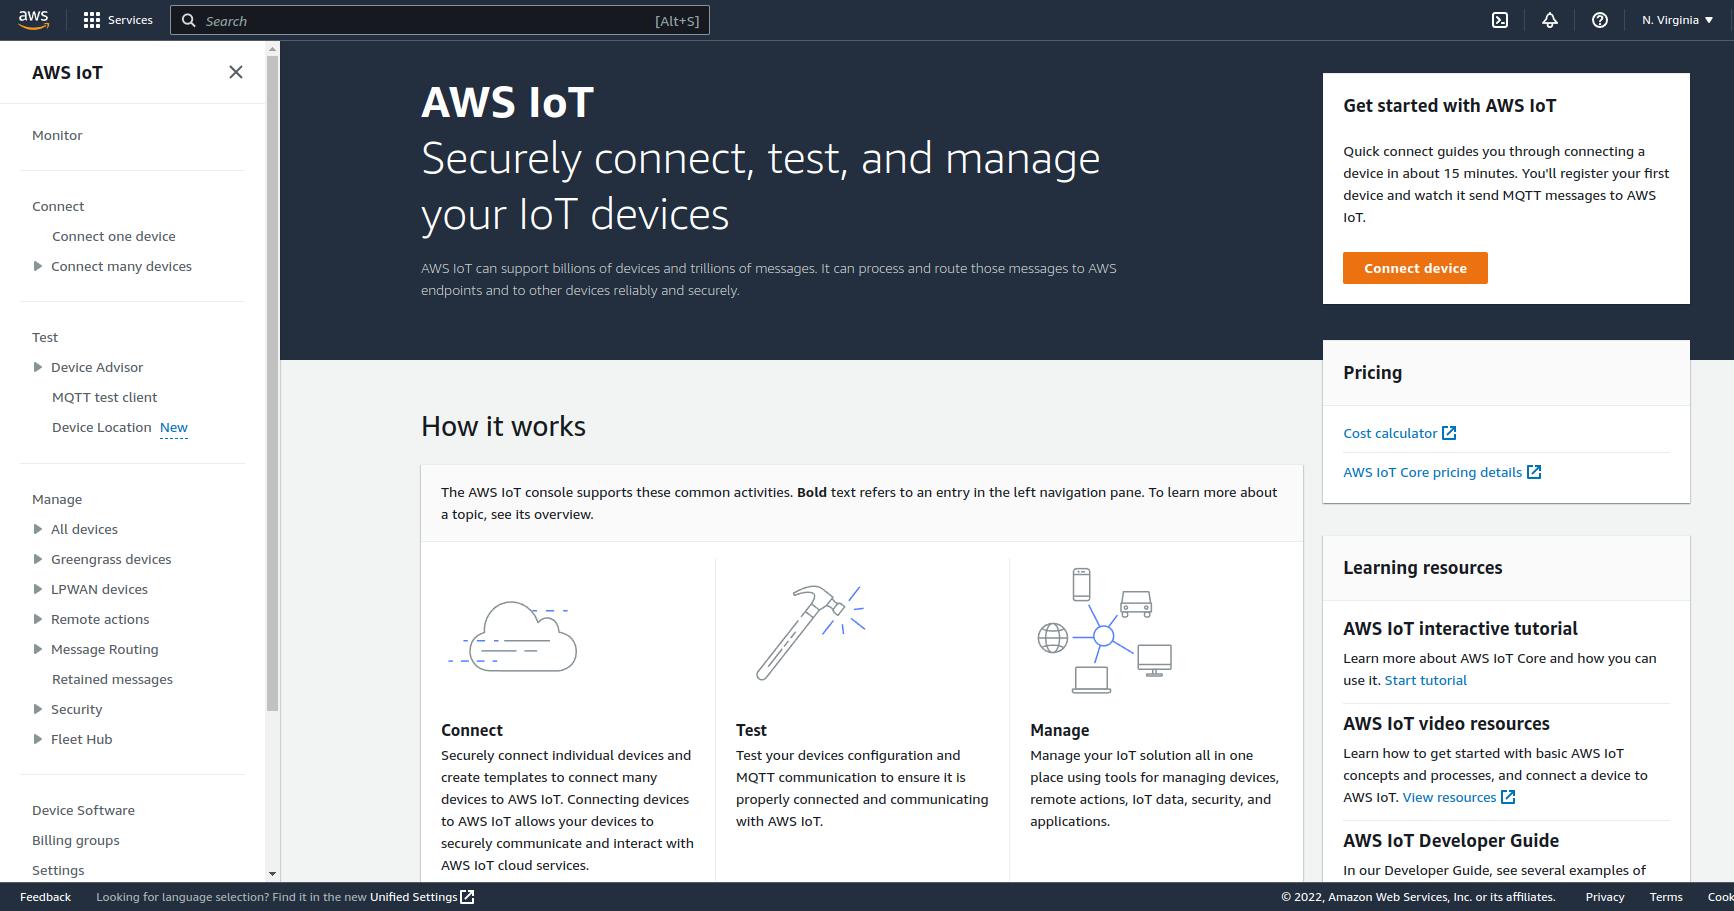
Amazon Web Services is an IT service and cloud computing company. The focus is providing users with access to a variety of cloud computing technologies to reduce specific system requirements and to allow for easy scalability of technology. We will specificly be walking through the AWS Iot Core. After creating an account and going to Console Home in the search bar type: IoT Core which should take you to a page like below.
Some devices are easier to configure than others with AWS. Esp8266 is a moderately challenging one as you don’t have the power and overhead like you do with the Raspberry Pi family. On the left bar go to Manage > All Devices > Things. Select the create things orange button and you should see a screen like below.
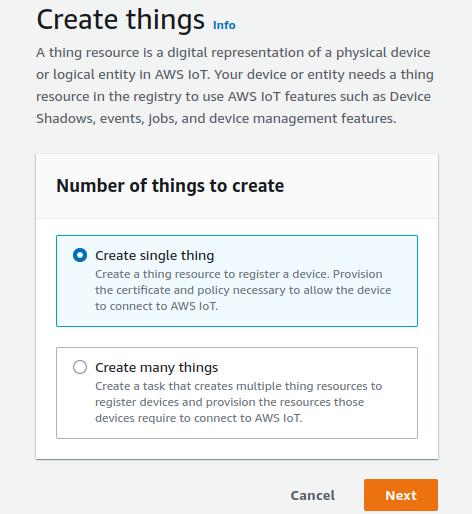
Select create a single thing and then give it a name. You will not be able to change the name later and it will be important for how you write you arduino code and your permissions later. I named mine: esp8266Testing. You can also create a shadow. This might be useful if you need to track state machine information across devices. For this tutorial we won’t be doing that.
Assuming you have not generated a certificate before you will want to auto generate them in the next step.
You will also want to make a policy. In the policies, select the Create policy option which will send you to the Security tab on the left. Name your policy what you want. For this tutorial it will be: esp8266Policy. Select the JSON and paste the following:
{
  "Version": "2012-10-17",
  "Statement": [
    {
      "Effect": "Allow",
      "Action": "iot:Connect",
      "Resource": "arn:aws:iot:AWS_REGION:AWS_ID:client/${iot:Connection.Thing.ThingName}"
    },
    {
      "Effect": "Allow",
      "Action": "iot:Publish",
      "Resource": [
        "arn:aws:iot:AWS_REGION:AWS_ID:topic/${iot:Connection.Thing.ThingName}/*",
        "arn:aws:iot:AWS_REGION:AWS_ID:topic/$aws/things/${iot:Connection.Thing.ThingName}/shadow/*",
        "arn:aws:iot:AWS_REGION:AWS_ID:topic/$aws/things/${iot:Connection.Thing.ThingName}/streams/*",
        "arn:aws:iot:AWS_REGION:AWS_ID:topic/$aws/things/${iot:Connection.Thing.ThingName}/jobs/*"
      ]
    },
    {
      "Effect": "Allow",
      "Action": "iot:Receive",
      "Resource": [
        "arn:aws:iot:AWS_REGION:AWS_ID:topic/${iot:Connection.Thing.ThingName}/*",
        "arn:aws:iot:AWS_REGION:AWS_ID:topic/$aws/things/{iot:Connection.Thing.ThingName}/shadow/*",
        "arn:aws:iot:AWS_REGION:AWS_ID:topic/$aws/things/{iot:Connection.Thing.ThingName}/streams/*",
        "arn:aws:iot:AWS_REGION:AWS_ID:topic/$aws/things/{iot:Connection.Thing.ThingName}/jobs/*"
      ]
    },
    {
      "Effect": "Allow",
      "Action": "iot:Subscribe",
      "Resource": [
        "arn:aws:iot:AWS_REGION:AWS_ID:topicfilter/${iot:Connection.Thing.ThingName}/*",
        "arn:aws:iot:AWS_REGION:AWS_ID:topicfilter/$aws/things/{iot:Connection.Thing.ThingName}/shadow/*",
        "arn:aws:iot:AWS_REGION:AWS_ID:topicfilter/$aws/things/{iot:Connection.Thing.ThingName}/streams/*",
        "arn:aws:iot:AWS_REGION:AWS_ID:topicfilter/$aws/things/{iot:Connection.Thing.ThingName}/jobs/*"
      ]
    },
    {
      "Effect": "Allow",
      "Action": "iot:UpdateThingShadow",
      "Resource": "arn:aws:iot:AWS_REGION:AWS_ID:topic/$aws/things{iot:Connection.Thing.ThingName}/shadow/*"
    },
    {
      "Effect": "Allow",
      "Action": "iot:GetThingShadow",
      "Resource": "arn:aws:iot:AWS_REGION:AWS_ID:topic/$aws/things{iot:Connection.Thing.ThingName}/shadow/*"
    }
  ]
}
You have to substitute AWS_REGION for your specific region i.g. us-east-1 and AWS_ID for your Account ID which can be found under your name at the top right of the console page. It should be a 12 digit number. Also substitute for the date as well. These policies are fairly generic and feature wildcard statements. Be careful when coding your arduino devices as these will allow for most types of topics to public to and from the device and AWS. The policy examples are helpful but they are missing some format.
- NOTE: This policy permission was a blocker for me. Take time to make sure it is in the right format for your use.
After you are done with the policy click create and go back to the create Things page you were at earlier. Attach the policy to the thing and this should bring up the page to Download the certificates and keys. This is the only time you can access these. Make sure to download everything and also make sure to not post these in full. The ones we absolutely need are the Device certificate, private key, and the Root CA cert CA1. After downloading those and clicking next you will get confirmation your Thing was created. Congratulations!
Go to your Thing and go to the Interact tab. Click the view settings option to go retrieve the devices endpoint. The format should be something like: xxxxxxxxxxxxx-ats.iot.us-east-1.amazonaws.com
Eventually we will using the MQTT test Client so keep the webpage open.
Final Notes:
A few final things from this section before we move on.
- Make sure your certificate is active
- Make sure your policy and Certificate are attached to your Thing
- Check your policy to see if it has the right format
- Get your endpoint for the Arduino coding.
Basic Arduino Code
This section of the article will focus on compiling some embed C to have an arduino device publish to a MQTT Topic. Going back to the IDE your code should look something like this:
#include "secrets.h"
#include <PubSubClient.h>
#include "ESP8266WiFi.h"
#include <ArduinoJson.h>
#include <NTPClient.h>
#include <WiFiUdp.h>

// Define NTP Client to get time
WiFiUDP ntpUDP;
NTPClient timeClient(ntpUDP, "pool.ntp.org", 36000, 60000);

BearSSL::X509List CERT_CA(AWS_CERT_CA);
BearSSL::X509List CERT_CRT(AWS_CERT_CRT);
BearSSL::PrivateKey CERT_PRIVATE(AWS_CERT_PRIVATE);

WiFiClientSecure wiFiClient;
PubSubClient pubSubClient(AWS_IOT_ENDPOINT, 8883, wiFiClient);

void setup()
{
    Serial.begin(115200);
    Serial.printf("SDK version: %s\n", ESP.getSdkVersion());

    timeClient.begin();
    wiFiClient.setX509Time(timeClient.getEpochTime());

    Serial.print("Connecting to ");
    Serial.print(WIFI_SSID);
    WiFi.mode(WIFI_STA);
    WiFi.setSleepMode(WIFI_NONE_SLEEP);
    WiFi.begin(WIFI_SSID, WIFI_PASSWORD);
    Serial.println();
    WiFi.waitForConnectResult();
    Serial.print("WiFi connected, IP address: ");
    Serial.println(WiFi.localIP());

    pubSubClient.setKeepAlive(90);
    pubSubClient.setBufferSize(6000);
    wiFiClient.setBufferSizes(512, 512);
    wiFiClient.setTrustAnchors(&CERT_CA);
    wiFiClient.setClientRSACert(&CERT_CRT,&CERT_PRIVATE);
}

void loop() {
    connectToAWSThing();
    pubSubClient.loop();

    delay(10000);
    pubSubClient.publish(topic_hello, "Hello from esp8266",false);

}

void connectToAWSThing()
{
    if (!pubSubClient.connected()){
        Serial.print("PubSubClient connecting to: ");
        Serial.println(AWS_IOT_ENDPOINT);
        while (!pubSubClient.connected())
        {
          timeClient.update();
          wiFiClient.setX509Time(timeClient.getEpochTime());

          Serial.println("Attempting MQTT connection...");
          if(pubSubClient.connect(THINGNAME)){
            Serial.println("Connected");
            }
          else{
            Serial.print("failed, rc= ");
            Serial.print(pubSubClient.state());

            char buf[256];
            wiFiClient.getLastSSLError(buf, 256);
            Serial.println("WiFiClientSecure SSL error: ");
            Serial.println(buf);
            }
        }
    }
}
Let me walk through some of this. Firstly, the included libraries are a combination of the 3rd party libraries mentioned above, esp8266 board libraries, and Arduino supported libraries. That accounts for everything but the secrets.h. This file is where you will put all your certs and password information. The layout of this file looks something like:
#include <pgmspace.h>

#define SECRET
#define THINGNAME "THINGNAME"

const char *WIFI_SSID = "WIFI NAME";
const char *WIFI_PASSWORD = "WIFI PASSWRD";
const char *AWS_IOT_ENDPOINT = "xxxxxxxx-ats.iot.xxxxxxxx.amazonaws.com";
const char *topic_hello = "THINGNAME/hello";

// Amazon Root CA 1
const char AWS_CERT_CA[]= ("-----BEGIN CERTIFICATE-----\n\
-----END CERTIFICATE-----\n");

// Device Certificate
const char AWS_CERT_CRT[]=("-----BEGIN CERTIFICATE-----\n\
-----END CERTIFICATE-----\n");

// Device Private Key
const char AWS_CERT_PRIVATE[]= ("-----BEGIN RSA PRIVATE KEY-----\n\
-----END RSA PRIVATE KEY-----\n");
- NOTE: Some tutorials will have you flash the keys and certs to the Wifi Module. This will save space in memory but it is a process that is difficult to automate and I ultimatly did not choose that approach. More information and the package for it can be found here.
- NOTE: The format that was chosen for the certs and keys probably means some modification to how you received them. specifically adding the “\n" to the end of each line.
Back to the code. Arduino IDE uses a setup and a loop format. You can also have global variables but keep in mind they are memory intensive. The NTPClinet gives you access to the EpochTime which is needed to make sure the certs and permissions are valid for you device. The calls to BearSSL are to reformat the certs,key and CA1 so that they can be understood by the esp8266 module. The pubSubClient uses your wifi connection to establish a connection with your IoT Core Thing and you can publish to MQTT topics. Later down the road you can also use other services like DynamoDM, S3, and the other Iot group. The setup block is mostly making sure the Wifi can be accessed by the device and to load the certs. Calls to Serial will send information to the Serial Monitor which is a good way of troubleshooting the device.
The helper function connectToAWS just checks to see if the pubSubClient is connected and if it is not it attempts to connect to AWS. Finally, “pubSubClient.publish(topic_hello, “Hello from esp8266”,false);” is what sends the “Hello from esp8266” string to the MQTT topic: “THINGNAME/hello” (so for this it would be esp8266Testing/hello). The false is so that the message isn’t kept in memory after publishing. This publish function also will return a boolean depending on if the device was able to publish to the topic.
After setting all of that up and uploading it to our device. The IDE will provide some hints if the code is not compiling correctly.
Back to AWS
Going back to Iot Core you will see on the left bar a category called Test. Select the MQTT test client under that. For this tutorial we will publish under “esp8266Testing/hello” and so that is the topic that we will have the MQTT test client subscribe to. Assuming your Arduino device is on and the code was uploaded with no problems you should see a message sent to that Subscription in a few seconds as shown below.
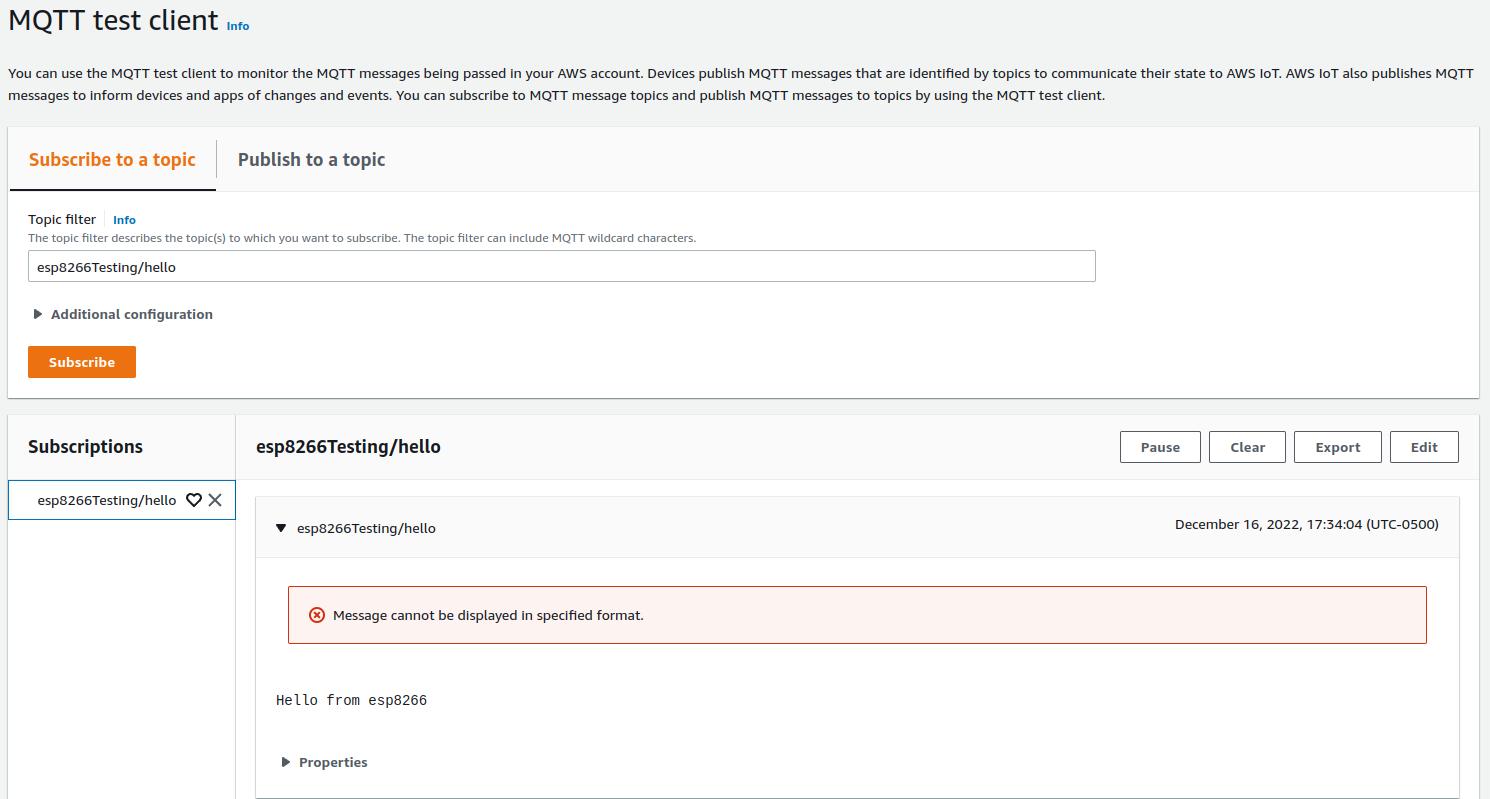
Congratulations! You have connected your Arduino to the cloud and a world of possibilities. The next article will focus on sensors, JsonArduino and memory allocation.
Conclusion
In this article,we downloaded and correctly configured the Arduino IDE for work with the esp8266. We set up an IoT Core Thing in AWS and the policies and permissions for that Thing. We uploaded a basic publishing script to our Arduino and when we subscribed to the topic with AWS we received a little hello message.